Wrap yourself in a hug

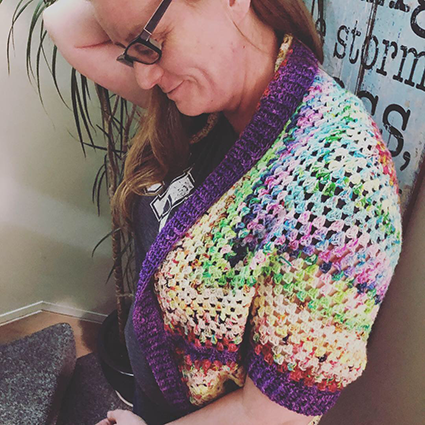
A lot of people have asked me for the pattern for a simple shrug I made using last years advent box, and my answer was always the same - its just a granny square.
The Granny shrug as a like to call it is the perfect pattern for utilising mini skeins because it really showcases multiple colours, by it is also an extremely versatile pattern that any yarn will work well, whether that be a semi solid or a variegated yarn.
Not only does it work well for various yarn colours, it is also the kind of pattern that you can use for any yarn weight too.
So here is the recipe - not a pattern, because this is more of a how to tutorial rather than an actual pattern.
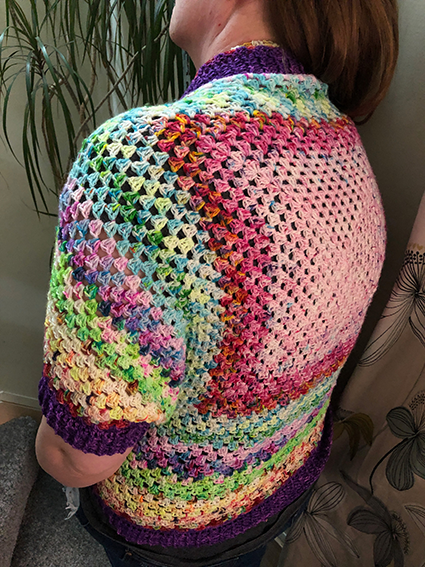
The bases of the shrug is a granny square, so thats where we start. Choose your yarn, and like I said any weight will work, the one pictured is sock weight merino nylon.
I used last years advent box to create mine, which was 12 x 20g mini skeins - so 240g then I used about 30g to add the rib, but these amounts are easily adjusted, which I'll explain as I go.
You start with a simple granny square - nothing special just your basic granny, you could of course get fancy here and use any motif pattern as long as it creates a squared finish.
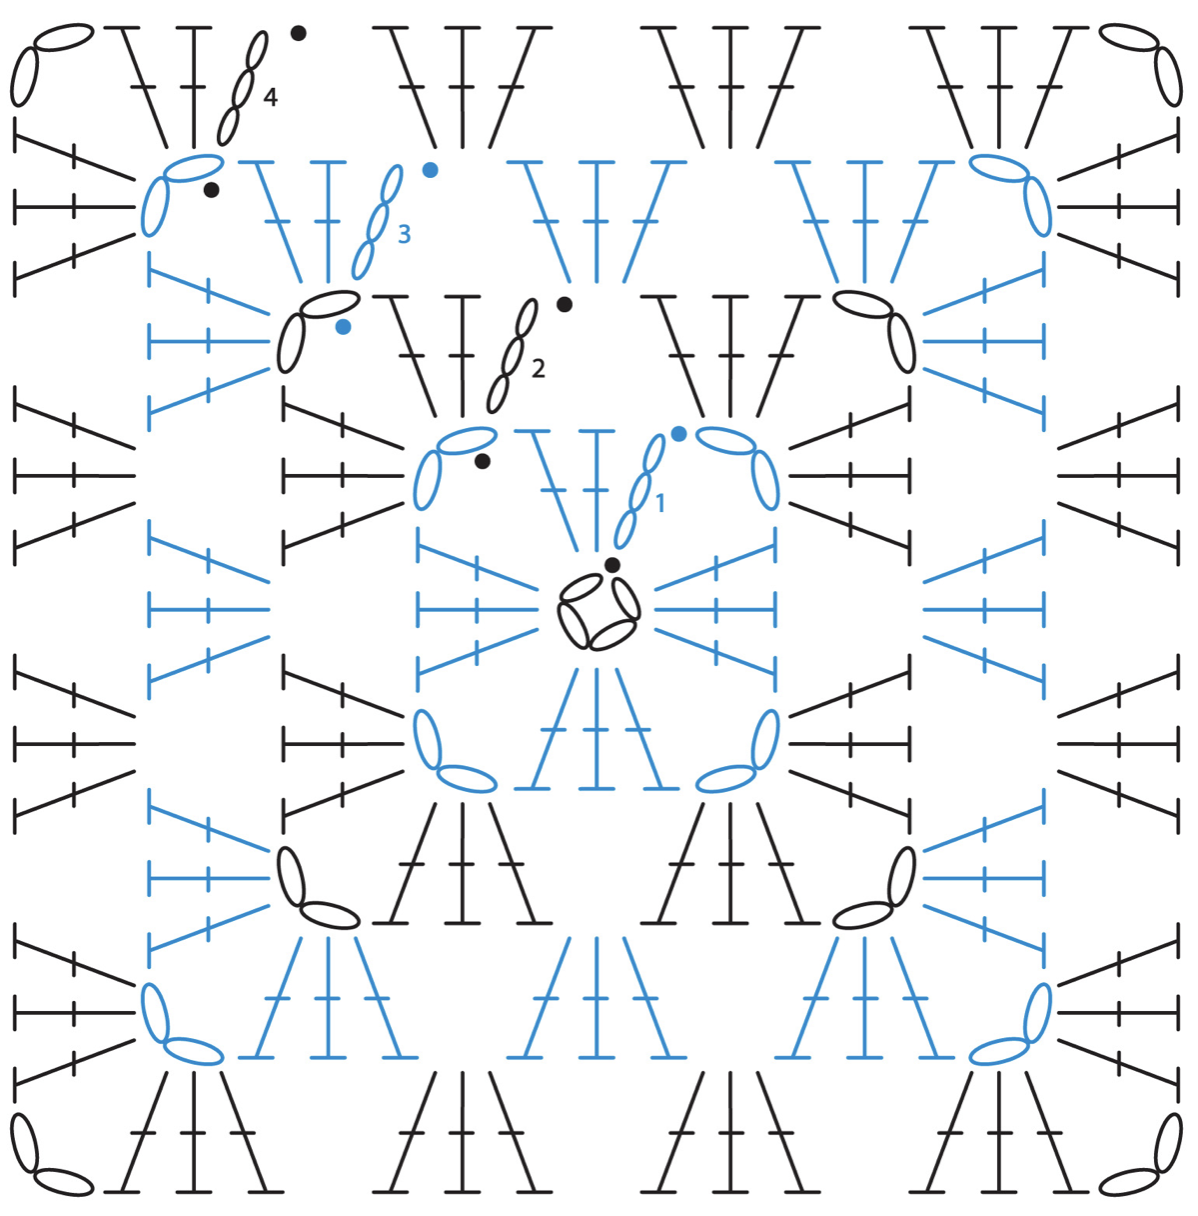
For the beginner who may be reading this I'm going to include a written pattern and a chart for a granny square below, for this of you who could make a granny square in your sleep scroll past this bit.
Pattern:
US terms
ch4, join with a ss into a ring.
Round 1 Ch3 (counts as dc), 2dc into ring, (ch2, 3dc into ring) 3 times, ch2, ss to top of beg ch-3, fasten off.
Round 2 Ch3 (counts as dc), (2dc, ch2, 3dc) into same sp, (3dc, ch2, 3dc) in each of next 3 ch-2 sp around, ss to top of beg ch-3, fasten off.
Round 3 Ch3 (counts as dc), (2dc, ch2, 3dc) into same sp, *skip 3 dc, 3dc into sp before next group of 3-dc, (3dc, ch2, 3dc) into next ch-2 sp; rep from * twice more, 3dc into sp before next group of 3-dc, ss to top of beg ch-3, fasten off.
Round 4 Ch3 (counts as dc), (2dc, ch2, 3dc) into same sp, *(skip 3 dc, 3dc into sp before next group of 3-dc) twice, (3dc, ch2, 3dc) in next ch-2 sp; rep from * twice more, (skip 3 dc, 3dc into sp before next group of 3-dc) twice, ss to top of beg ch-3, fasten off.
Weave in all ends
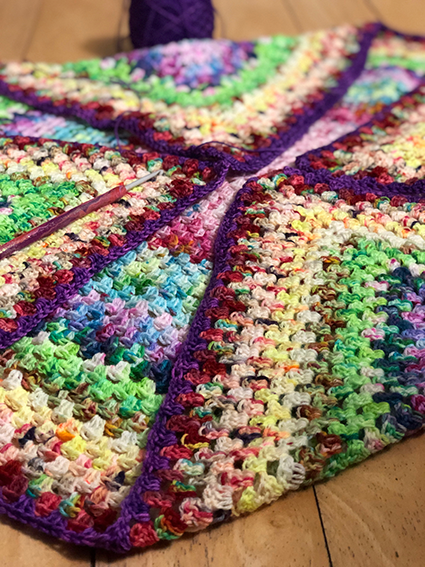
So that is the basis for the shrug - a huge square! - see why this is a recipe and not a pattern ;)
Continue to create your square until the size of your granny is larger than your shoulders, you want your square to be about the width of your shoulders then half again, this dimension is again not set in stone - make it smaller for a snugger fit, keep going and make it bigger to have a really oversized baggy shrug, its your choice and because the "pattern" doesn't call for a stitch count then the worlds your oyster!
Once you are happy with the size of your square your going to create the shrug shape... excited? It looks like its complicated but its oh so simple!
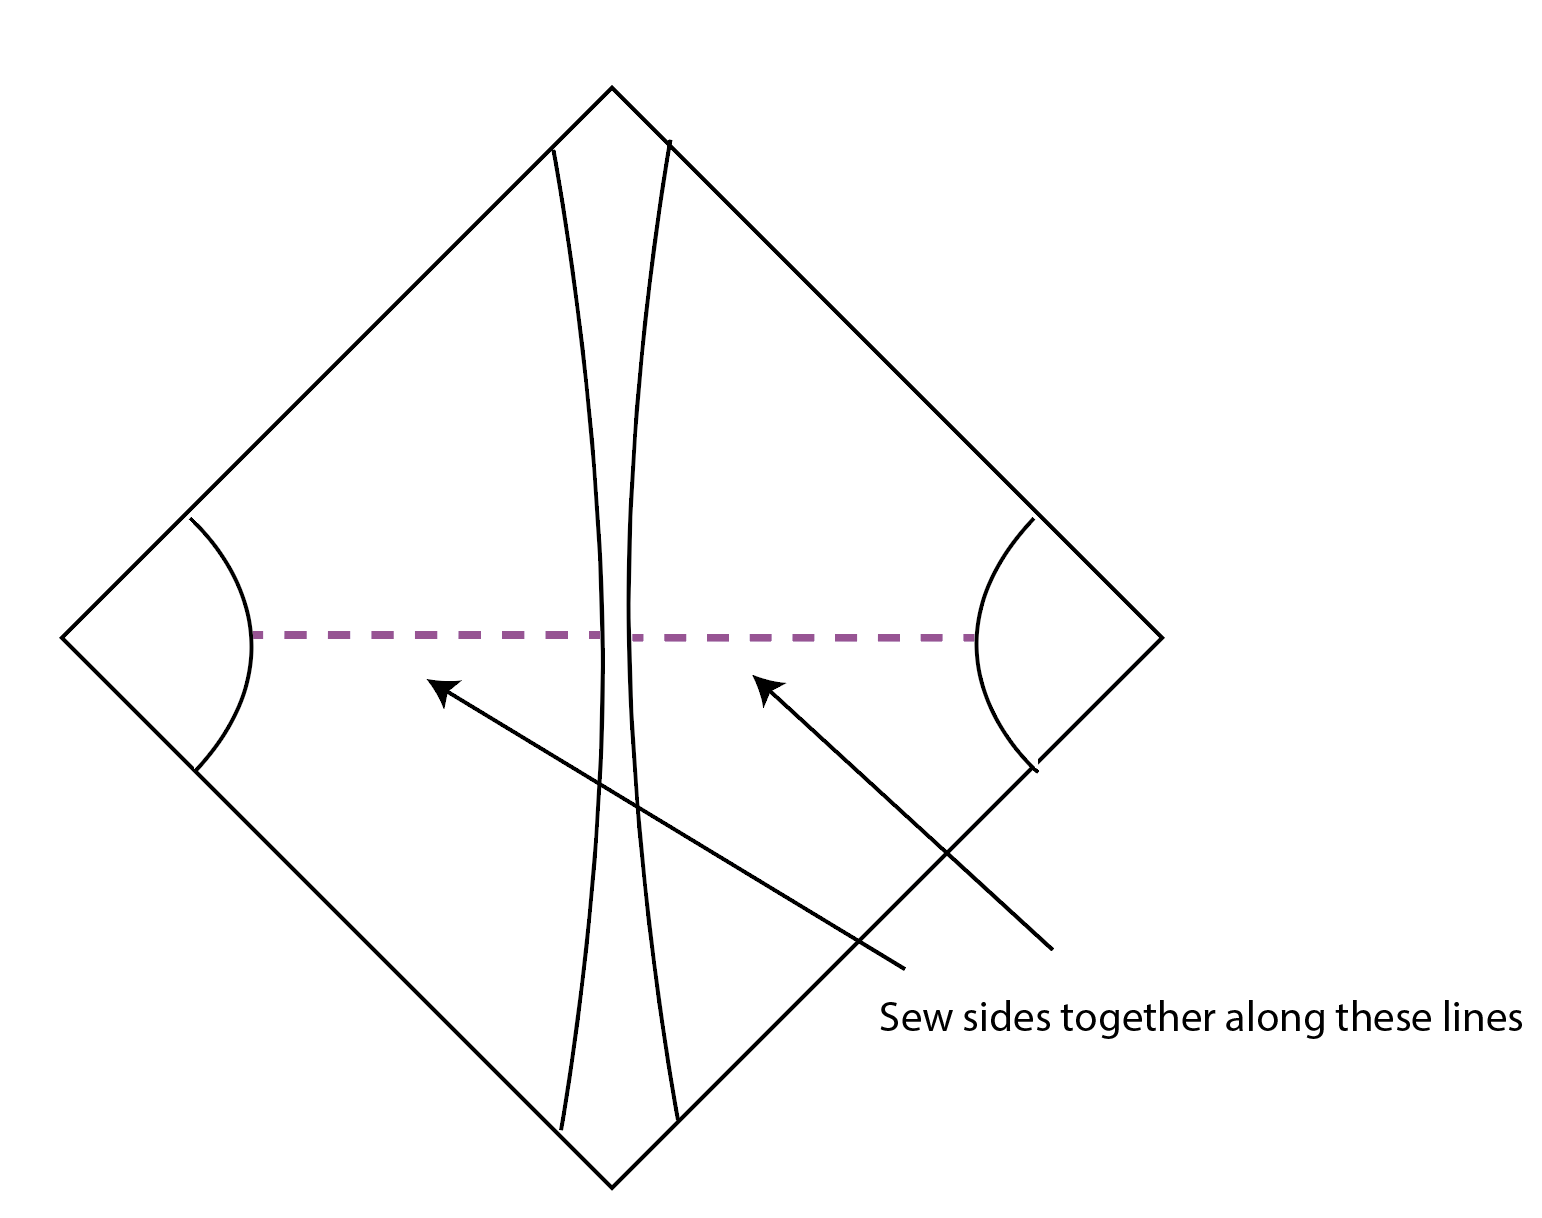
So lay your square on the floor and bring all 4 corners into the middle - effectively creating a diamond (see below)
Now you are going to seam the arms, either sew together or crochet together along the horizontal edges in the middle of your shrug, but don't go all the way to the end, leave 2 or 3 inches open as these will become your arm holes. (see the diagram below)
Ta Da! you have gone from a granny square to a cardigan... its clever isn't it!
Now we add the finishing touches, like any good knitted cardigan we need a button band, now while I chose not to add a button closure to my shrug there is no reason why not - but I'm going to assume your happy without for the purpose of this tutorial.
So now you have your shrug shape, be sure to try it on and check your happy with the size, if you find its not big enough just un-stitch those two lines and make your square bigger - its very versatile.
If you are happy with the size then you can go ahead and add the rib of your choice around the arm hole edges and all the way around the middle edges. I chose to do a simple front post back post into every stitch around, it gives a lovely comfy edge much like the rib on a good knitted hat or cuff.
I can't remember just how many rounds I added but again that it up to you, make a big comfy rib or play it safe and add just a few rows - the joy of this shrug is that with small changes you really can make it your own.
And that my friends is it! how simple was that!
I have worn my shrug to many a yarn show and had compliments a plenty, and I bet you will too - will you choose a solid colour? or jazz it up with all the neon bright mini skeins? Choices choices.
For those of you who can't visualise what I have described here (and I don't blame you, its not the easiest to explain in words) then I have also uploaded a quick video I took explaining the construction.
I really hope you enjoy this tutorial, and I can't wait to see all your finished shrugs - be sure to tag me on Insta if you make one as I would love to see.
Enjoy, and happy hooking
Love Lisa xx